The lock icon displayed next to the URL extensions of websites indicates that your data is encrypted via the SSL certificate, a secure protocol, and is securely transmitted to and returned from the server. This icon indicates that an SSL certificate is installed.
If you have decided to install a free SSL certificate and you have a cPanel hosting server, this article is perfect for you. You can follow the steps in our article without needing any additional configuration.
Free SSL Installation
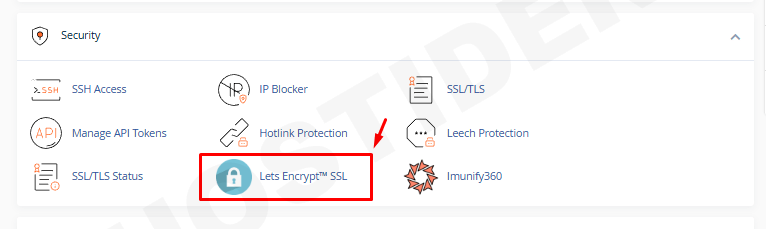
The installations are nearly the same for all hosting companies. First, we log into our cPanel account. After logging in, we go to the Security category and click on the turquoise Let's Encrypt™ SSL button.
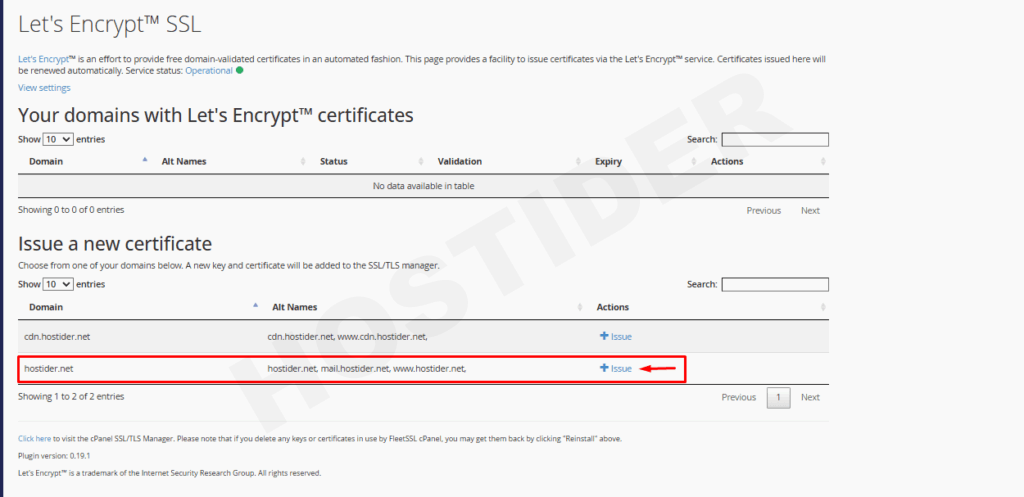
We scroll down to the Issue a new certificate section at the bottom of the screen and click the + Issue button located right next to our domain name.
This will direct you to a new page. On this page, it asks which areas you want to install the SSL certificate for. Select the options suitable for you and click the blue Issue button at the bottom.
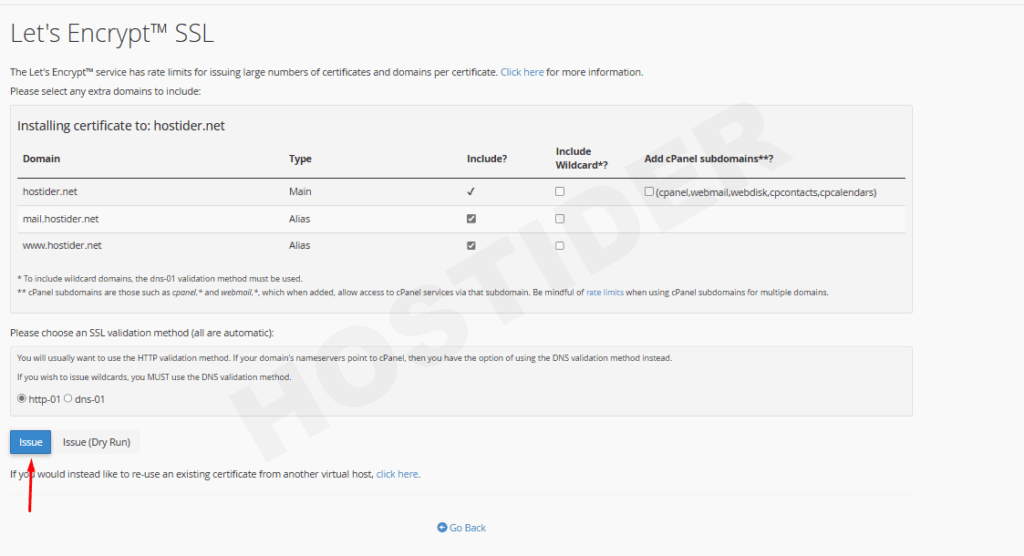
To explain some of the fields on this page:
-
Include Wildcard**?: If you want to perform a wildcard SSL installation, you can select the appropriate areas on your domain name.
-
Add cPanel subdomains***?: You can select this if you want to install an SSL certificate on subdomains created by cPanel. For example, webmail.yourdomainname.tld
-
Please choose an SSL validation method (all are automatic): If you want to perform a direct installation, the http method is the most common and trouble-free method. However, if you want to install it as a wildcard, you must choose the DNS method.
If some extensions of your domain name do not point directly to your server, you must uncheck the boxes for those areas that do not point. Otherwise, you may encounter an error. For example, if your email configurations are with a different service provider and are not hosted directly on your server, you must uncheck the box for the mail area. This is because the free SSL certificate is defined according to the server and its configurations.
On the next page, you will be greeted with a notification screen indicating that the process has been completed successfully. After this process, in an average of 10-15 seconds, there will be no SSL error on your website, and you will be able to connect smoothly via the https protocol.

If you do not get a screen image like the one above in the final stage and receive a red error message, it is highly likely that you are encountering an error due to an area that is not pointing, as we mentioned. We recommend checking the configurations again.
If you cannot reach the page we mentioned, your disk capacity or inode limit may be full. We recommend checking these areas first to avoid encountering any errors.
