The lock icon displayed next to the URL extensions of websites indicates that your data is encrypted via the SSL certificate, a secure protocol, and is securely transmitted to and returned from the server. This icon indicates that an SSL certificate is installed.
If you have decided to install a free SSL certificate and you have a Plesk panel hosting server, this article is perfect for you. You can follow the steps in our article without needing any additional configuration.
Free SSL Installation
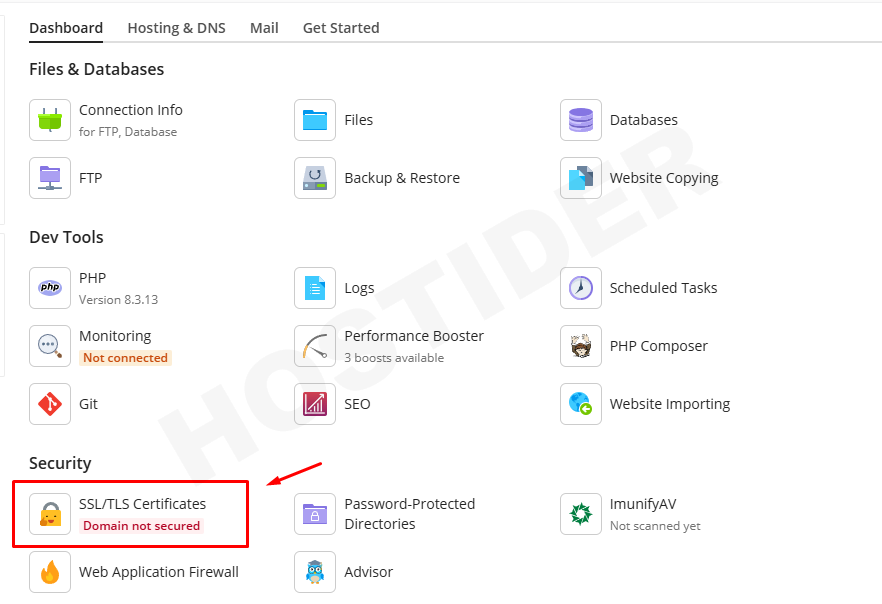
First, we log into our Plesk panel and enter the details of our domain name. If you have a root account, you can follow the steps: Domains – yourdomainname.tld. From the menu that appears, click the SSL/TLS Certificates button located under the Dashboard tab.
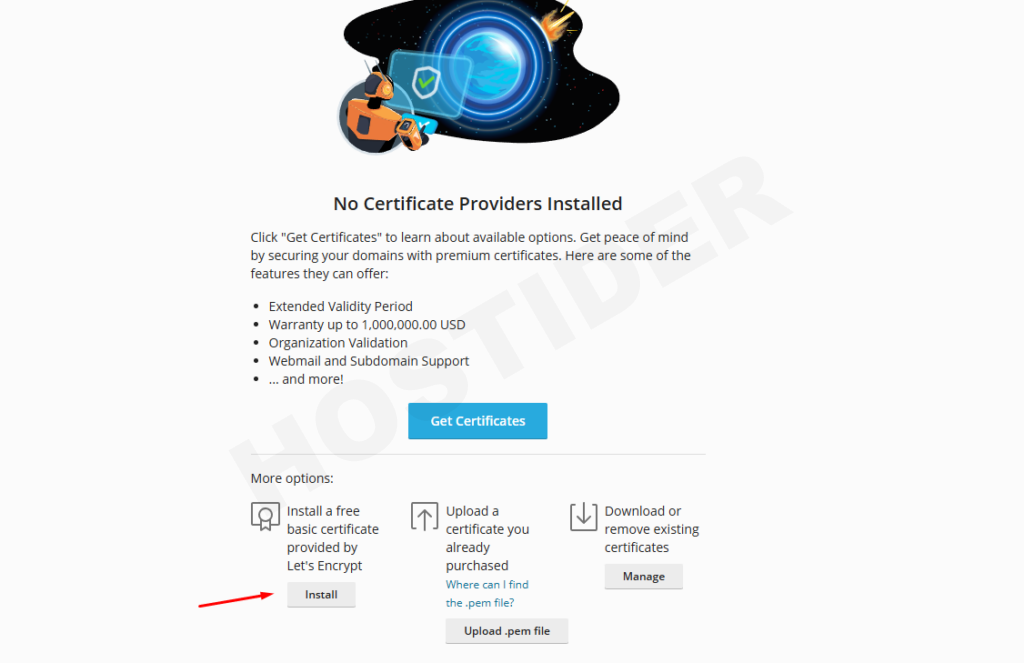
Scroll down to the More options section on the page and click the Install button immediately below the text Install a free basic certificate provided by Let’s Encrypt.
A window will open on the left side. The menu that appears will ask you which areas you want to install the SSL certificate for. Make your selection and click the blue Get it free button at the bottom.
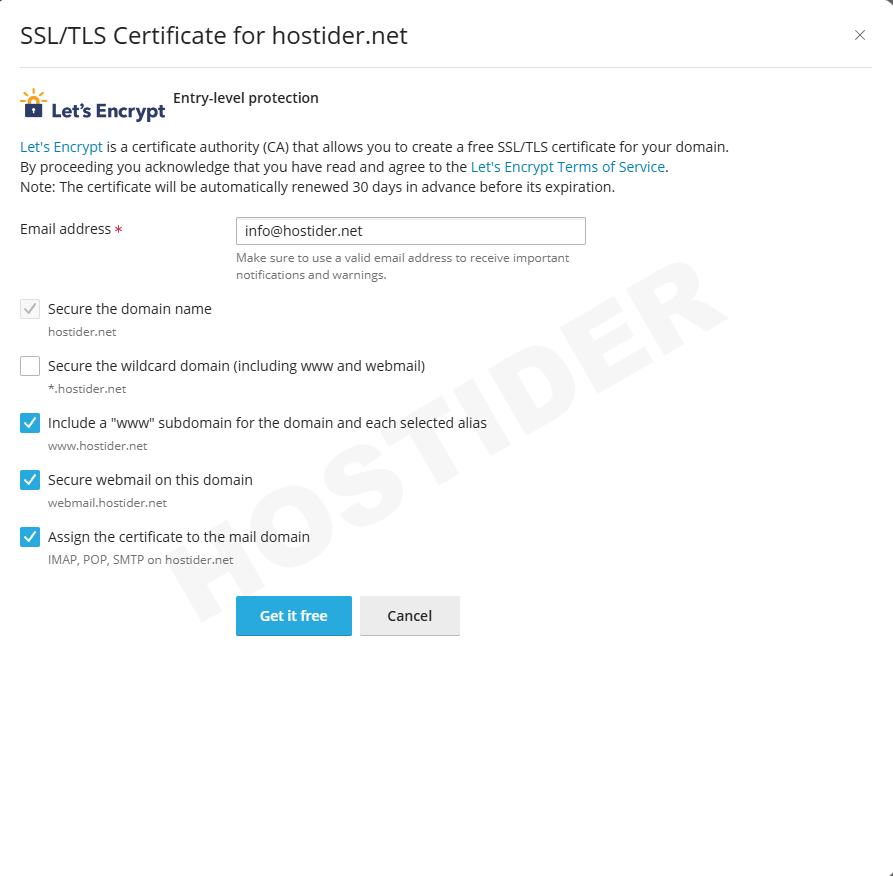
If some extensions of your domain name do not point directly to your server, you must uncheck the boxes for those areas that do not point. Otherwise, you may encounter an error. For example, if your email configurations are with a different service provider and are not hosted directly on your server, you must uncheck the box for the mail area. This is because the free SSL certificate is defined according to the server and its configurations.
If there are no issues, the next stage will ask you if everything is ready and if you want to continue with the installation. You can complete your installation by clicking the Continue button.
If you receive an error starting with The yourdomainname.tld DNS zone contains an, it means that one of the areas you are providing the SSL certificate for is not pointing to your server. You can continue without selecting the area that does not point to your server.
Thank you for your feedback.
Sorry about that :( We'll work to make it better.
You voted before.
107 times viewed | 0 people fount it helpful
